When you buy products via links on our website, we might receive an affiliate commission. Learn more
22 Creative and Affordable Garden Fence Ideas for Your Yard
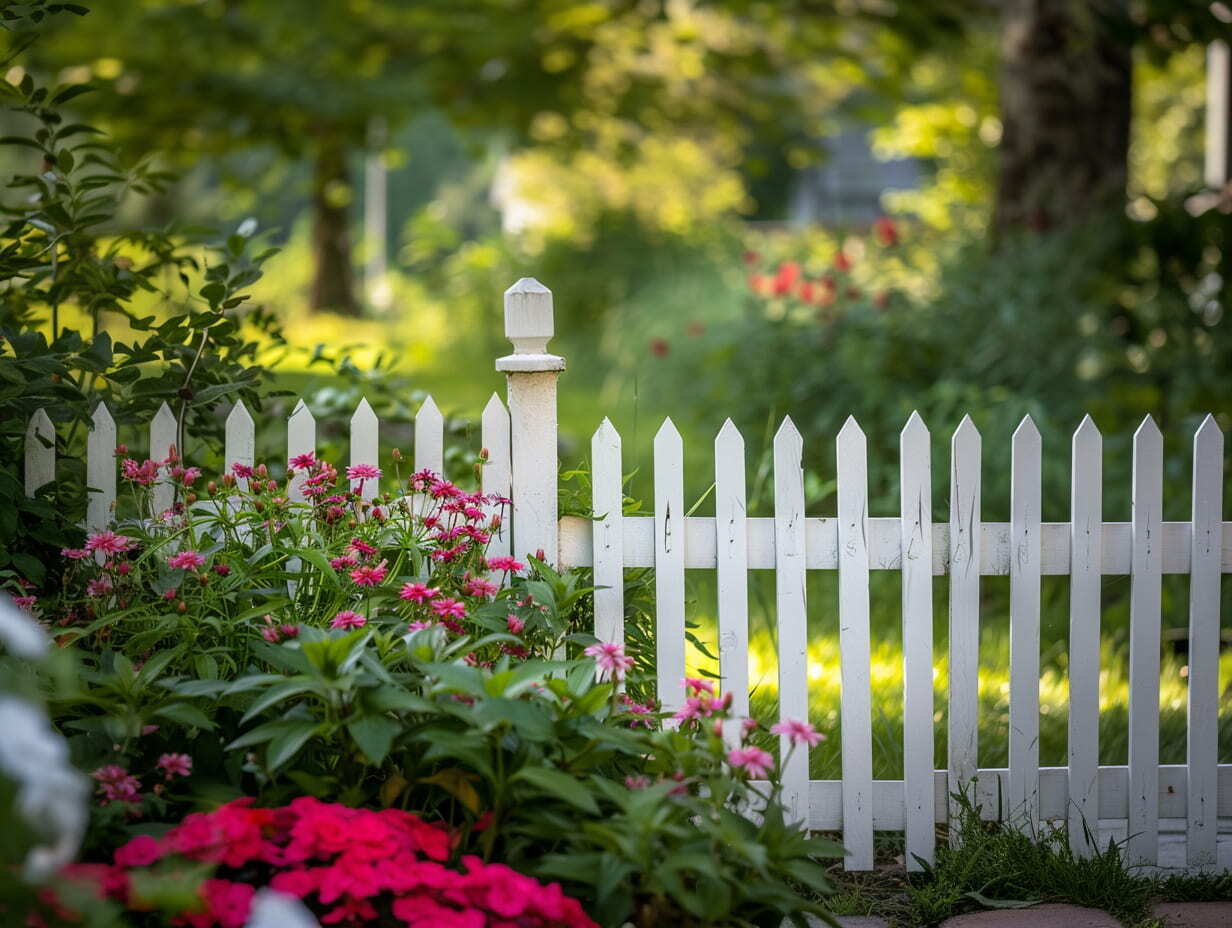
Enhance your outdoor space with creative and affordable garden fence ideas that cater to every style and budget. From the rustic charm of repurposed wooden pallets to the sleek, modern appeal of laser-cut metal panels, this guide explores a diverse range of materials and designs.
Whether you prefer the natural durability of bamboo or the quaint look of woven branches, you'll find plenty of inspiration to transform your yard.
Learn how to implement these ideas with practical tips and techniques that ensure your new fence not only looks great but also offers privacy, security, and a unique personal touch.
Use Repurposed Wooden Pallets for a Rustic Look
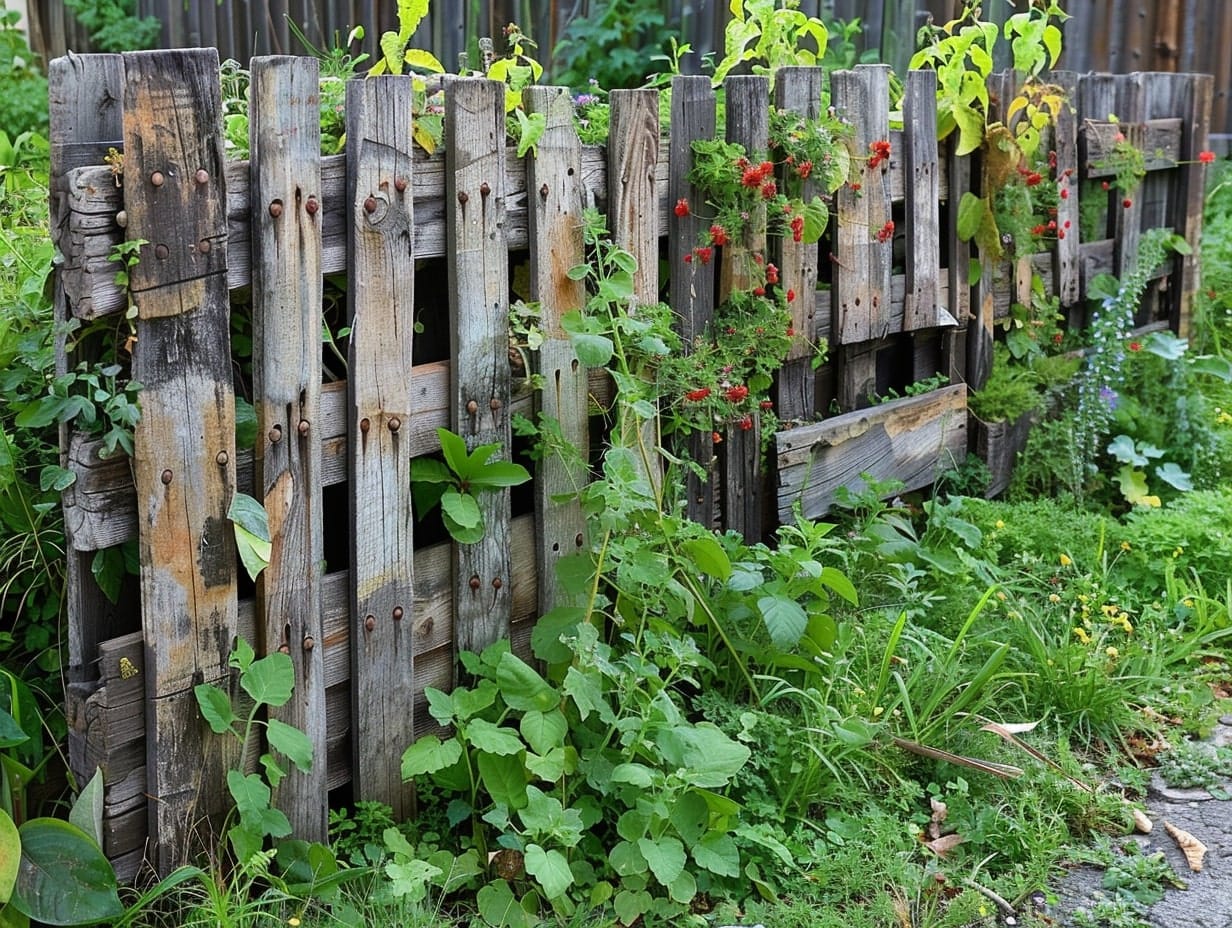
These pallets are often available for free or at a minimal cost from local warehouses or businesses looking to dispose of excess materials. The rugged look of the wood lends a charming, country-inspired feel to any garden.
For assembly, attach the pallets together using nails or screws at the supports to form a continuous barrier. You can customize the height by stacking pallets, or cut them to size for a more tailored look.
Painting or staining the pallets is an optional step to match your garden's theme or to enhance the wood's durability. Natural tones like browns and greens will maintain the rustic vibe while blending beautifully with your garden's landscape.
Leverage the Natural Beauty and Durability of Bamboo
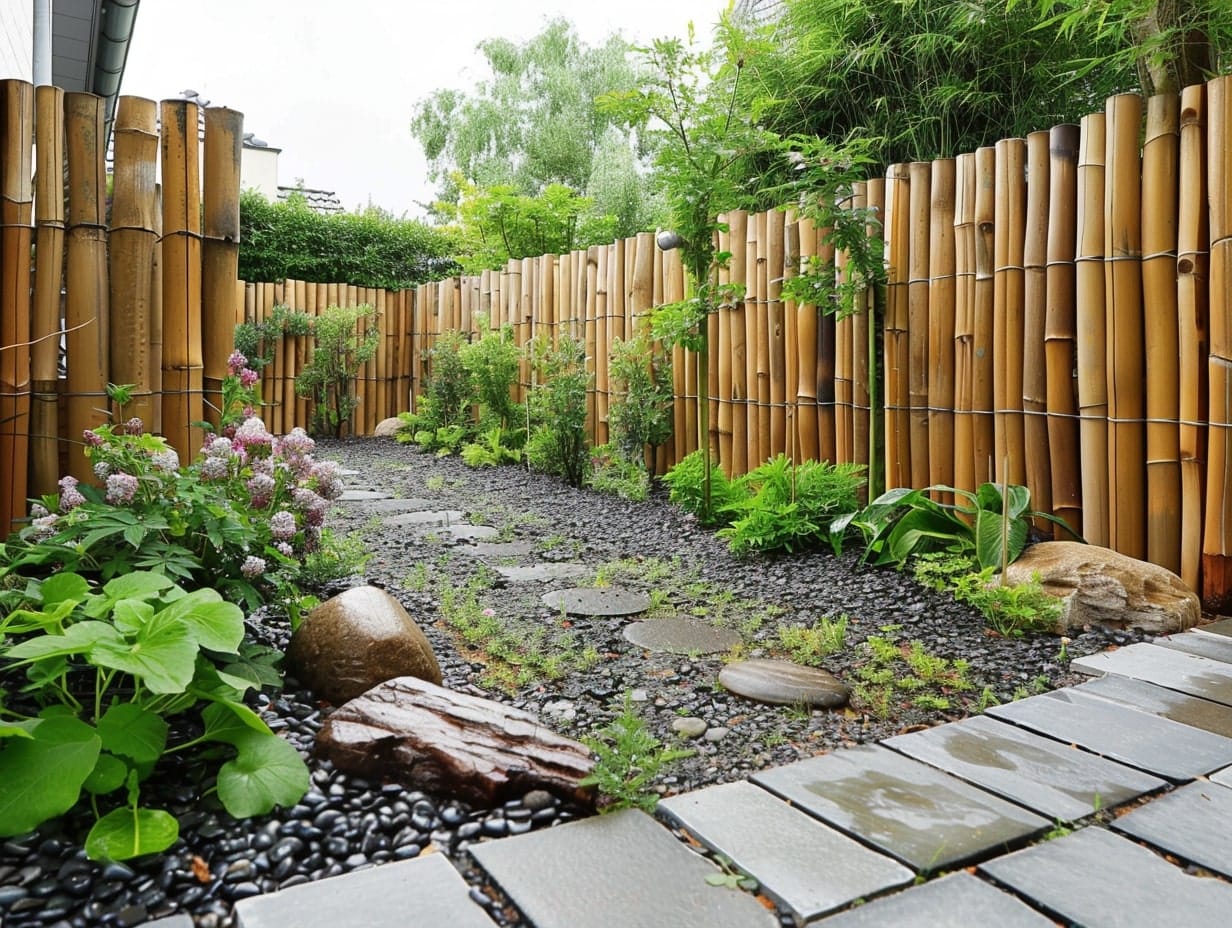
Bamboo is an excellent material for garden fencing due to its natural beauty, strength, and sustainability. You can use whole bamboo poles for a minimalistic look or split and woven for a more intricate design.
To install a bamboo fence, secure the poles in place using sturdy ground anchors and connect them with horizontal supports.
You can treat bamboo with natural oils or a clear sealant to enhance its weather resistance and maintain its original hue. Alternatively, you can allow it to weather naturally to a silvery-gray finish.
Create a Charming Fence by Weaving Branches or Twigs
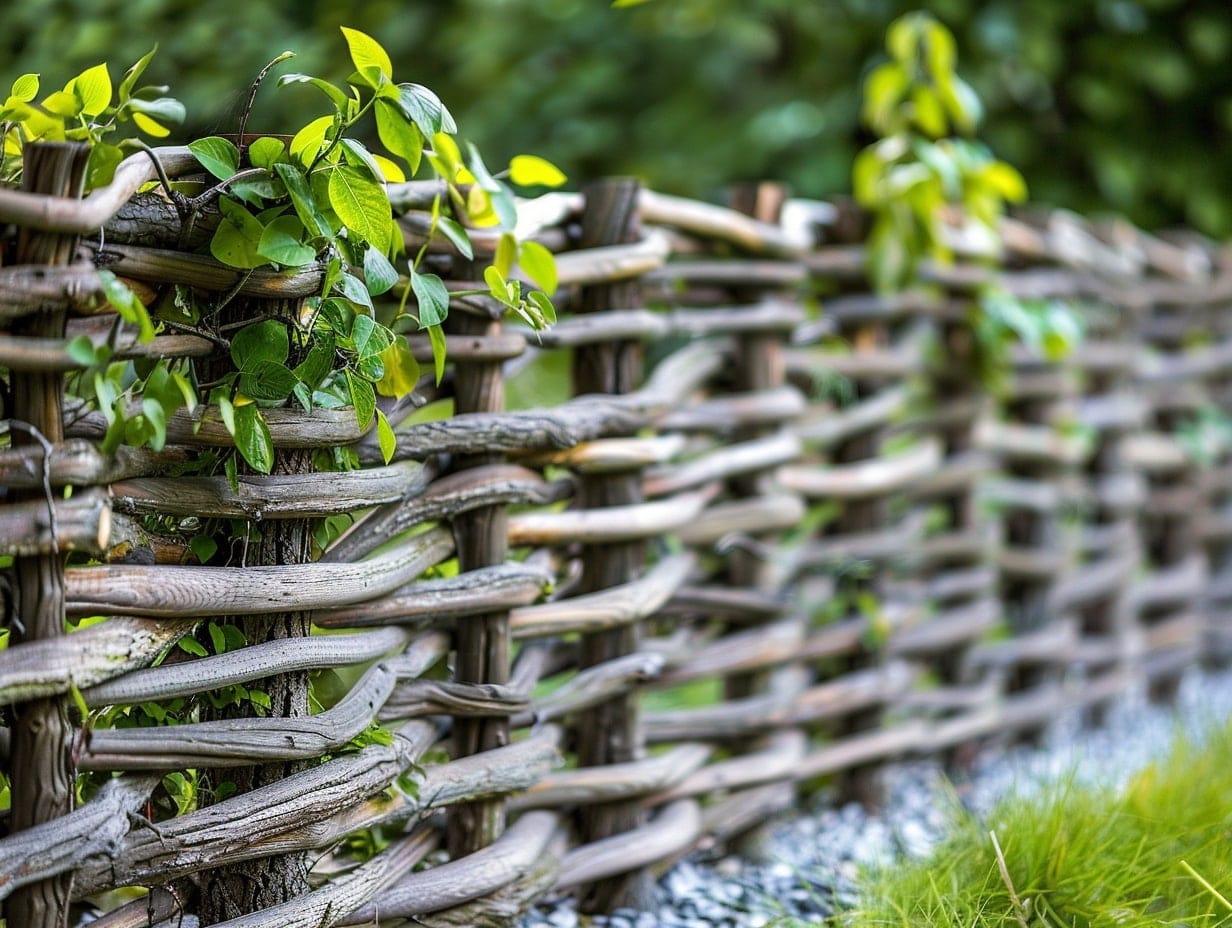
This style, often referred to as a wattle fence, is one of the oldest fencing techniques and is perfect for adding rustic charm to any garden space.
To start, gather straight, flexible branches or twigs from materials like willow, hazel, or bamboo. The flexibility of these materials is key as they need to be woven around sturdy stakes driven into the ground at regular intervals along your desired fence line.
Begin the construction by installing these stakes — typically made from the same or a more robust wood — into the ground, spacing them about one to two feet apart depending on the stability and aesthetic you desire.
Once your stakes are in place, weave the branches horizontally, alternating in and out around each stake. Start from the bottom and work your way up, pressing down the layers as you go to tighten the weave and ensure the structure's strength.
Combine Corrugated Metal Panels With Wooden Frames for a Modern Look
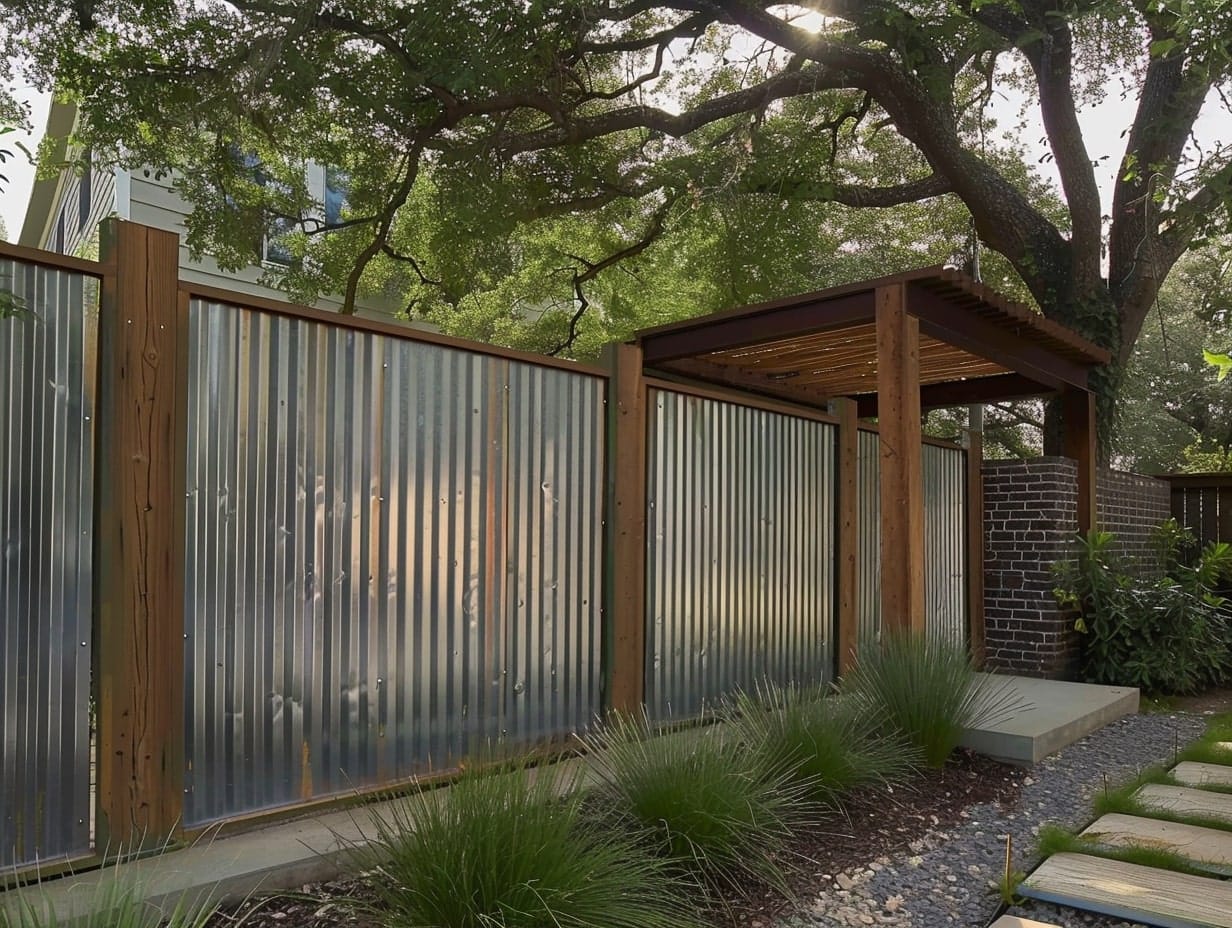
This design balances the industrial texture of metal with the natural warmth of wood, making it a visually appealing choice for contemporary outdoor spaces.
To begin, select high-quality, weather-resistant wood such as cedar, redwood, or pressure-treated pine for the frame. For the metal panels, choose a gauge that is durable enough to withstand weather conditions while still being lightweight and easy to handle.
Construct the wooden frames to the desired dimensions of your fence sections, ensuring each frame is robust enough to support the metal panels. The frames can be built with horizontal or vertical supports depending on the look you're aiming for and the size of the panels.
Install the corrugated metal panels within these frames, securing them with screws that are designed for metal work.
Use Garden Trellises for Climbing Plants to Form a Living Fence
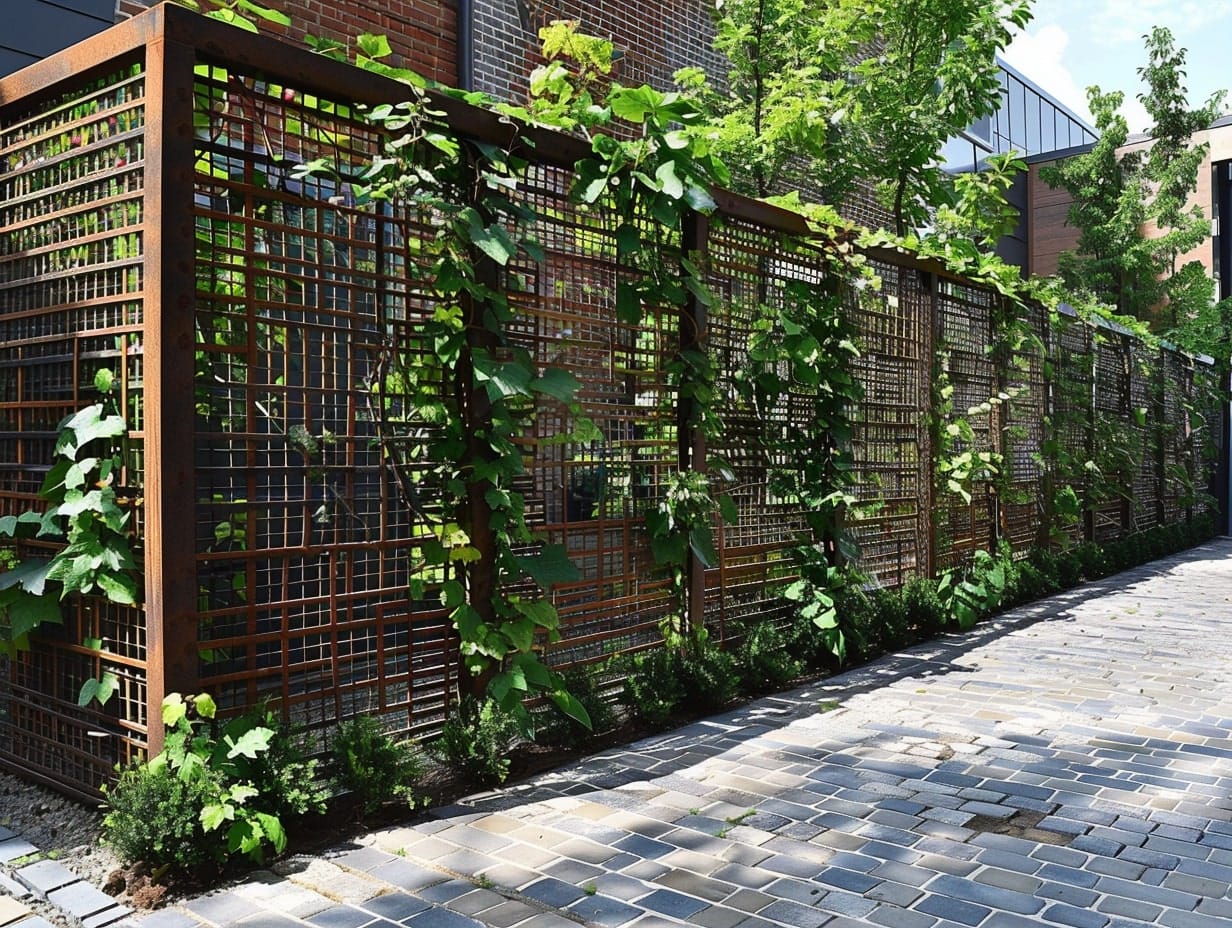
This method combines the structural support of trellises with the lush, natural beauty of climbing plants, creating a vibrant green barrier that enhances both privacy and aesthetics.
Firstly, select your trellis. Trellises come in various materials including wood, metal, and plastic, each offering different strengths and visual styles. Wooden trellises can provide a natural, rustic look, while metal trellises offer a more modern appearance and are generally more durable.
When choosing climbing plants, consider the climate, soil quality, and the amount of sunlight your garden receives. Popular options include ivy, clematis, wisteria, climbing roses, and honeysuckle.
Combine Wire Mesh With Wooden Frames for an Open Fence
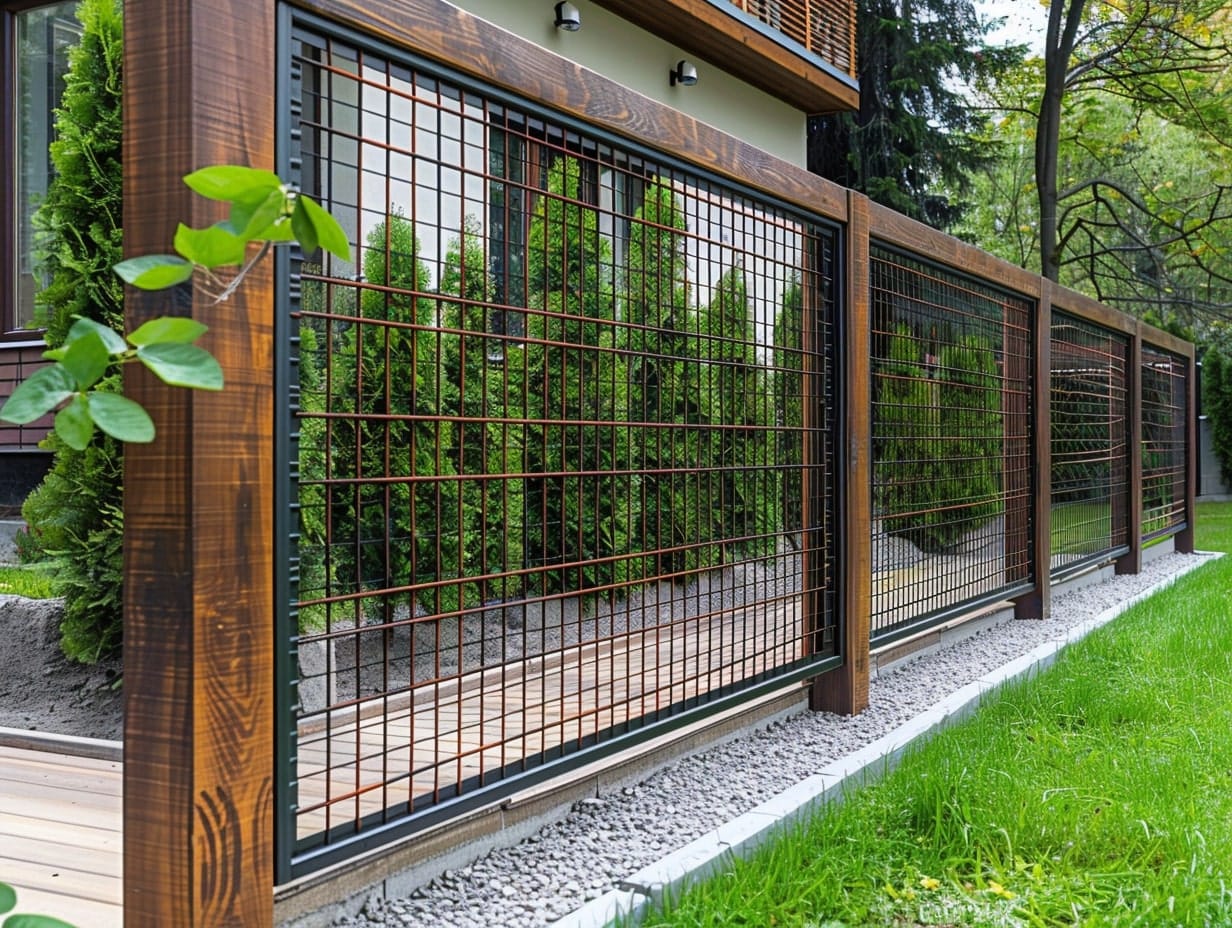
Start by choosing high-quality, weather-resistant wood for the frames, such as cedar, redwood, or pressure-treated pine. For the wire mesh, select a gauge that is strong enough to withstand external pressures but fine enough to prevent small animals from passing through.
Common choices include chicken wire, welded wire, or hardware cloth, depending on the level of security and the size of the openings you prefer.
Construct the wooden frames to your desired dimensions. These can be made to fit specific spaces or can be standardized if you're planning a more extensive fence line. Secure the frames in the ground using concrete footings or sturdy post holders for stability.
Attach the wire mesh to the inside of the wooden frames using staples or U-nails. Ensure the mesh is pulled tight to avoid sagging and that there are no sharp edges exposed that could harm animals or people.
Repurpose Old Iron for a Classy Look
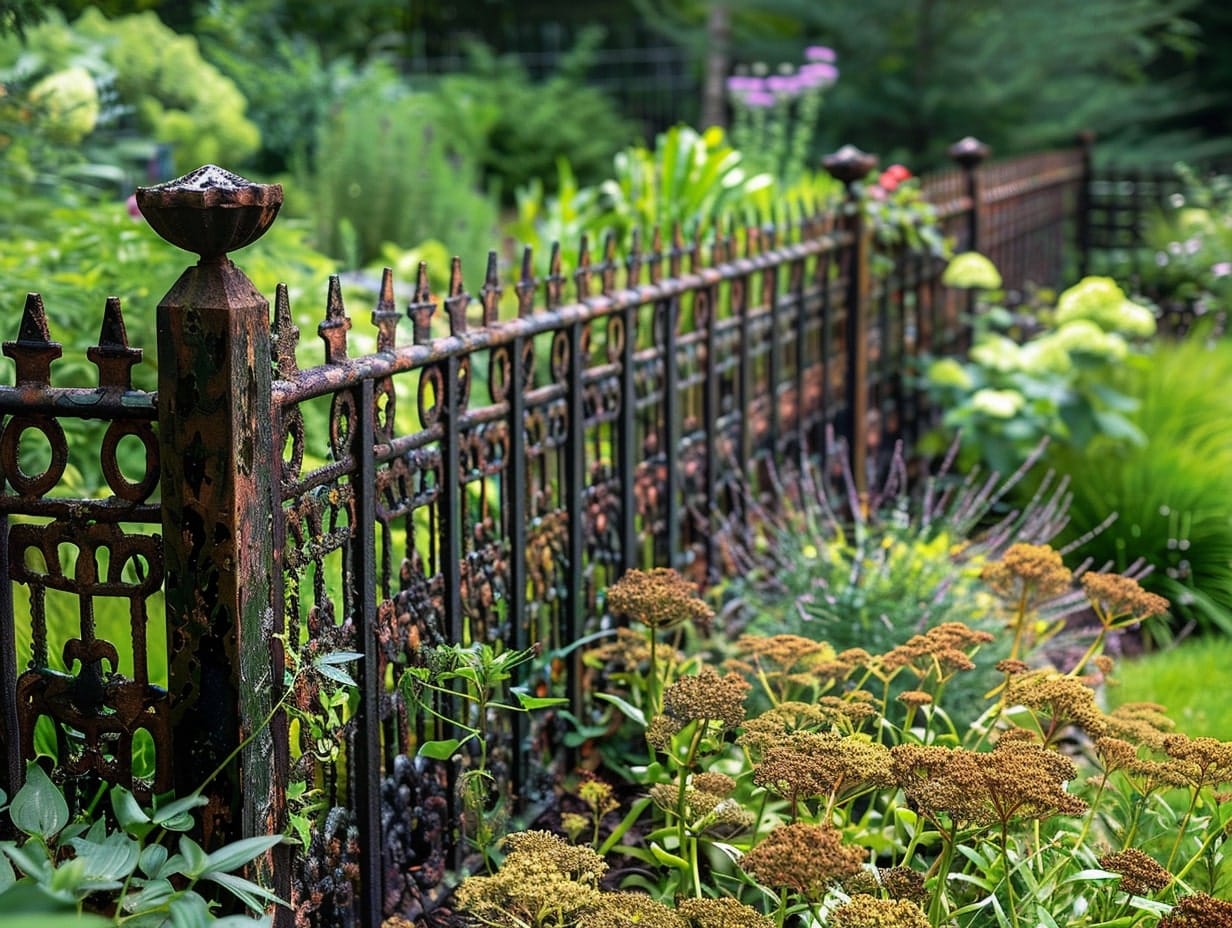
Look for items like gates, railings, panels, or decorative grilles. Once you have gathered enough iron pieces, assess them for any necessary repairs.
Design your fence layout by considering how each piece will fit together. You may need to cut the iron to size or weld multiple pieces together to create longer sections or to achieve the desired height.
For installation, set iron posts securely in the ground with concrete to ensure stability. Attach the iron sections to these posts using appropriate hardware, such as bolts or welding.
Use Thick Ropes Tied Between Wooden Posts for a Nautical Look
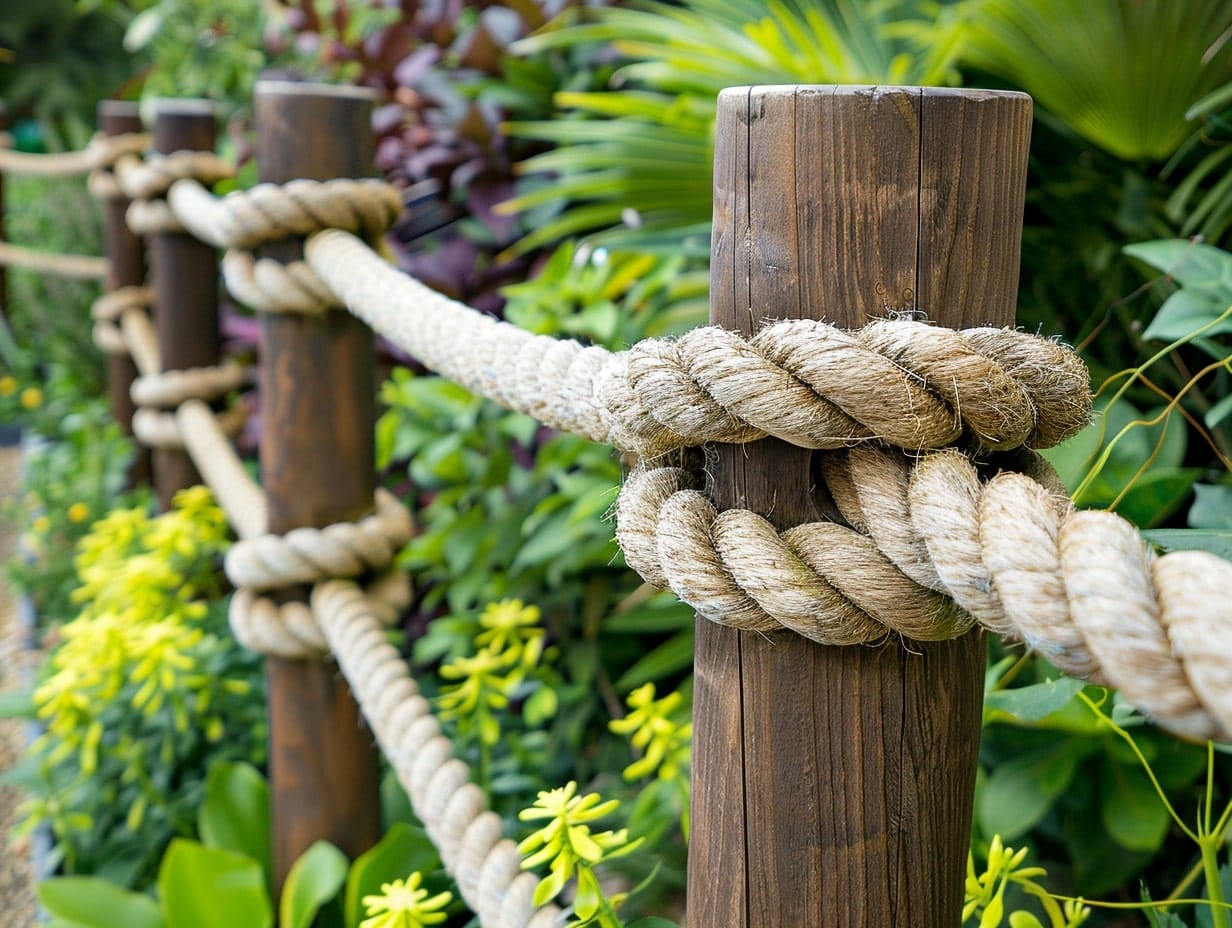
Choose durable, weather-resistant ropes like manila to ensure longevity and maintain the maritime aesthetic. The wooden posts should be robust and treated to resist rot and weathering, anchoring them securely into the ground for stability.
Space the posts according to the length of the rope and the desired tension, ensuring the rope remains taut and visually appealing.
This fencing style not only serves as a decorative boundary but also evokes a relaxed, seaside vibe, making it a creative and thematic choice for landscaping.
Use Laser Cut Metal Panels for an Artistic Touch
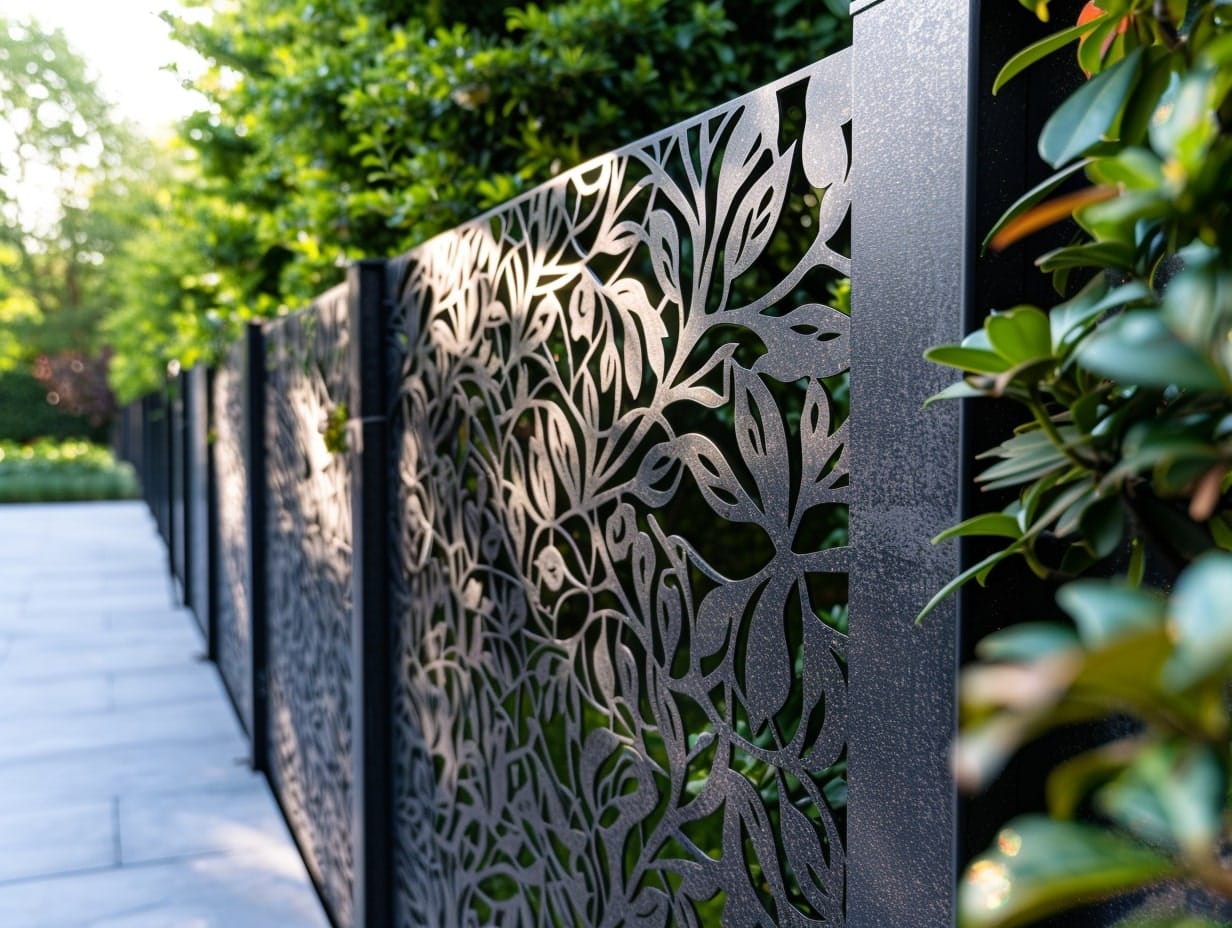
These panels can be custom designed with intricate patterns ranging from geometric to floral or abstract motifs, allowing for a personalized aesthetic that complements your garden's theme.
Select high-quality, weather-resistant metal such as aluminum or stainless steel to ensure durability and resistance to rust.
Install the metal panels between sturdy posts — wooden, metal, or even concrete — anchored securely into the ground. The posts' material can either contrast with or complement the panels, depending on the desired effect.
Laser-cut panels not only serve as a sturdy barrier but also cast beautiful shadows when sunlight filters through, creating a dynamic visual effect throughout the day.
Stack Cinder Blocks for a Creative and Sturdy Fence
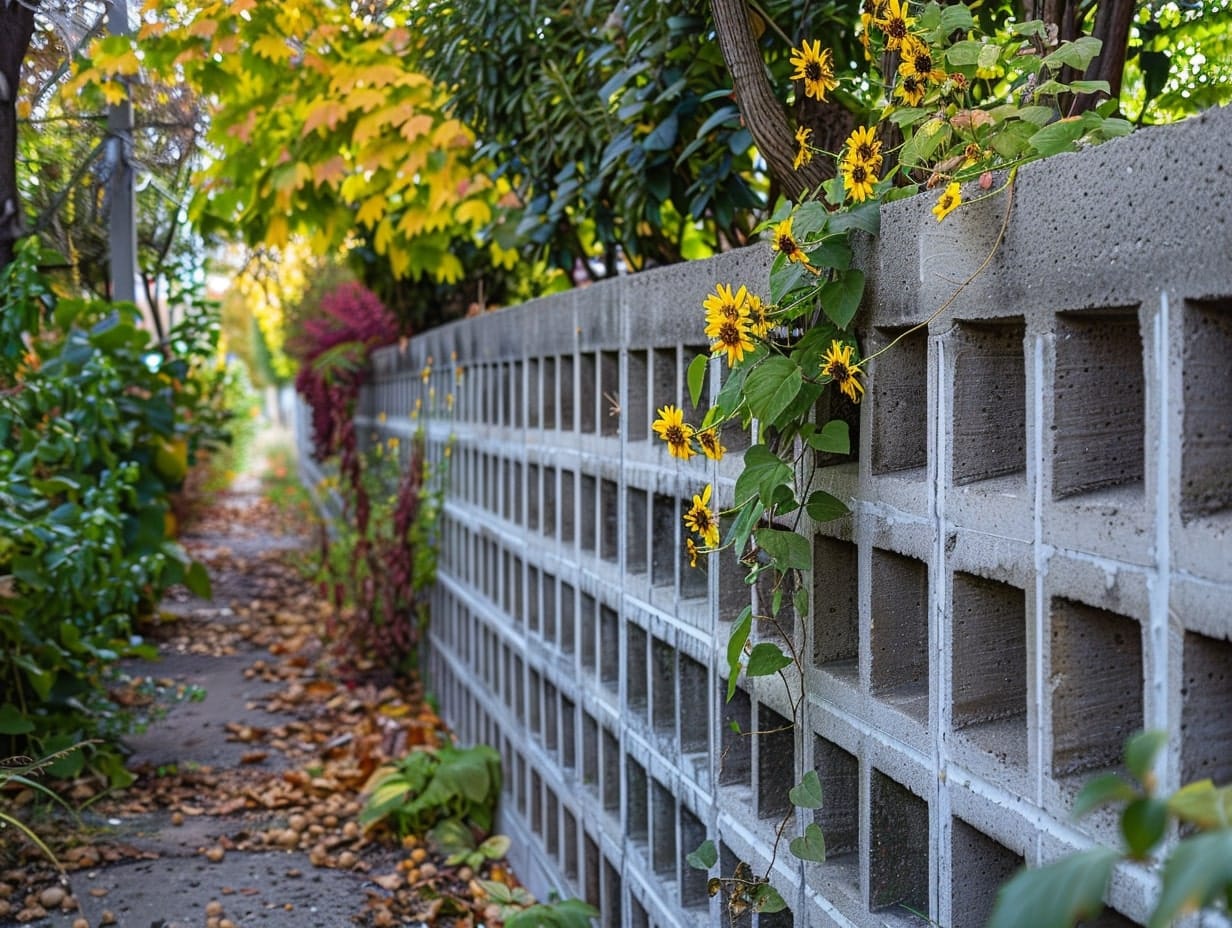
This type of fence is particularly suitable for contemporary landscapes and can be customized in various ways to enhance its appeal.
To start, plan your fence layout and determine the number of cinder blocks you'll need. Choose high-quality blocks that are uniform in size for consistency and stability. You can paint the blocks or leave them in their natural gray for a more industrial look.
Begin by preparing a solid foundation, leveling the ground where your fence will be, and laying a footing of concrete for stability. Stack the cinder blocks in your desired pattern, using mortar to bond the blocks together for a more permanent structure.
Build a Fence With Lively Mosaic Tiles
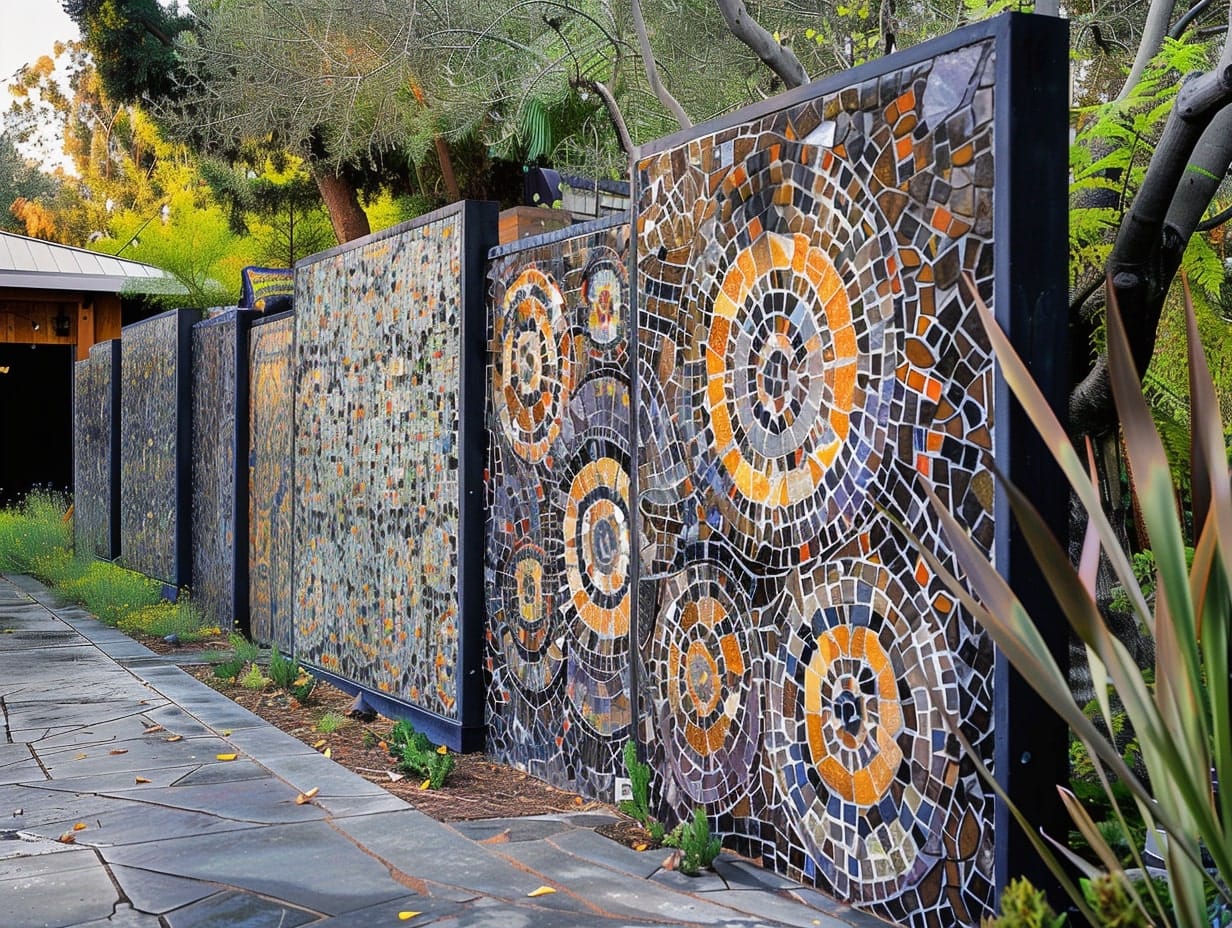
Start with a sturdy base for your fence, such as concrete, wood, or metal panels. This foundation needs to be strong enough to support the weight of the tiles and grout.
Plan your mosaic design. You can create patterns, depict landscapes, or even render abstract art. For inspiration, consider the colors and themes of your garden. Select tiles in various colors and shapes to fit your design.
Use a tile adhesive suitable for outdoor use to fix the tiles onto the fence. Once the adhesive has set, apply grout over the entire tiled area, filling the spaces between the tiles.
Attach Planters on the Fence to Create a Vertical Garden
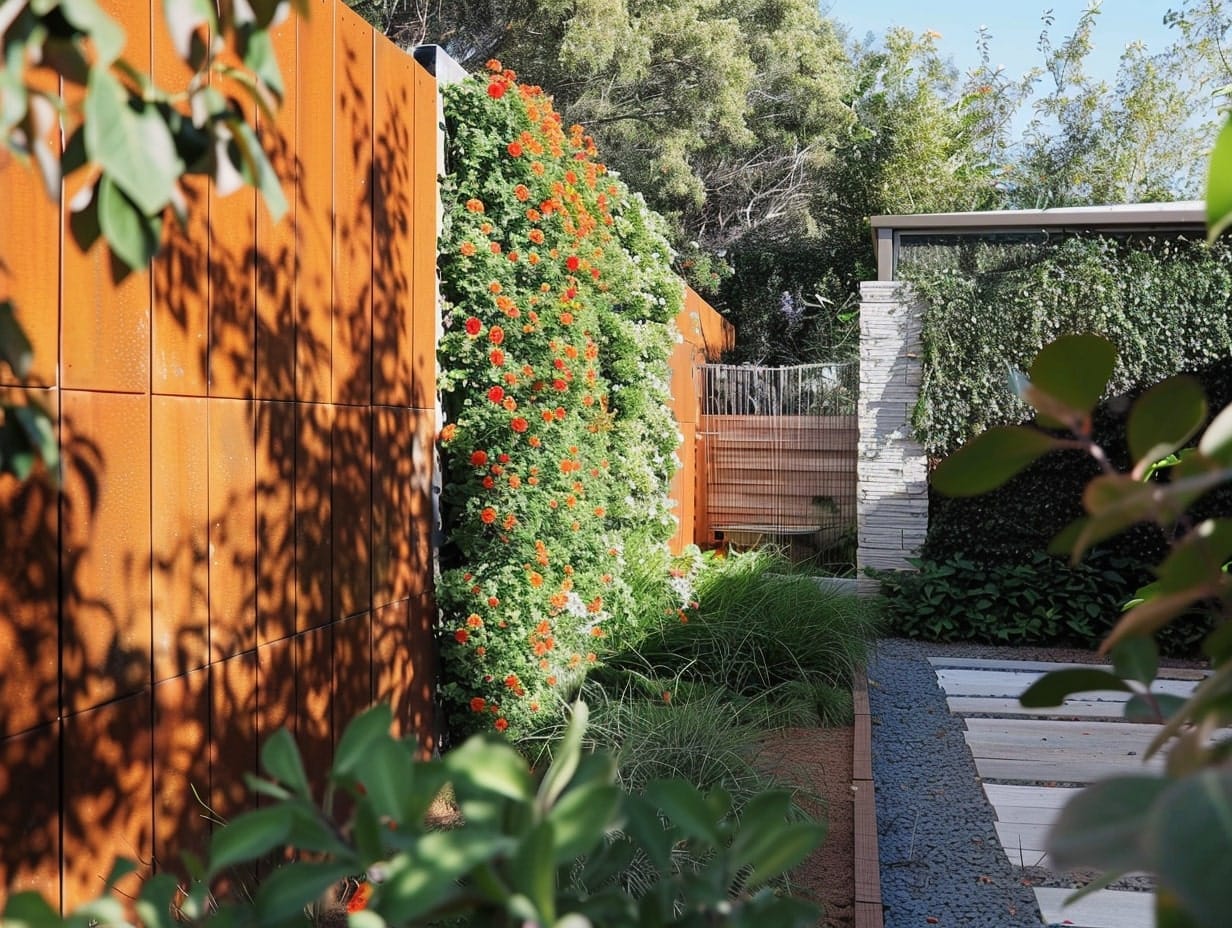
Select the type of planters that best fit your fence material and aesthetic preference. You can use recycled materials like old gutters, wooden crates, or commercially available hanging planters specifically designed for vertical gardening.
Install hooks, brackets, or mounting systems appropriate for the type of planters you are using. The height and spacing will depend on the size of the planters and the types of plants you intend to grow.
Hang or attach the planters on the hooks or brackets. Plan the layout by considering the sunlight requirements. Consider using a mix of trailing plants, herbs, succulents, or small flowers for a diverse and attractive display.
Paint a Mural on a Wooden Fence for a Personal Touch
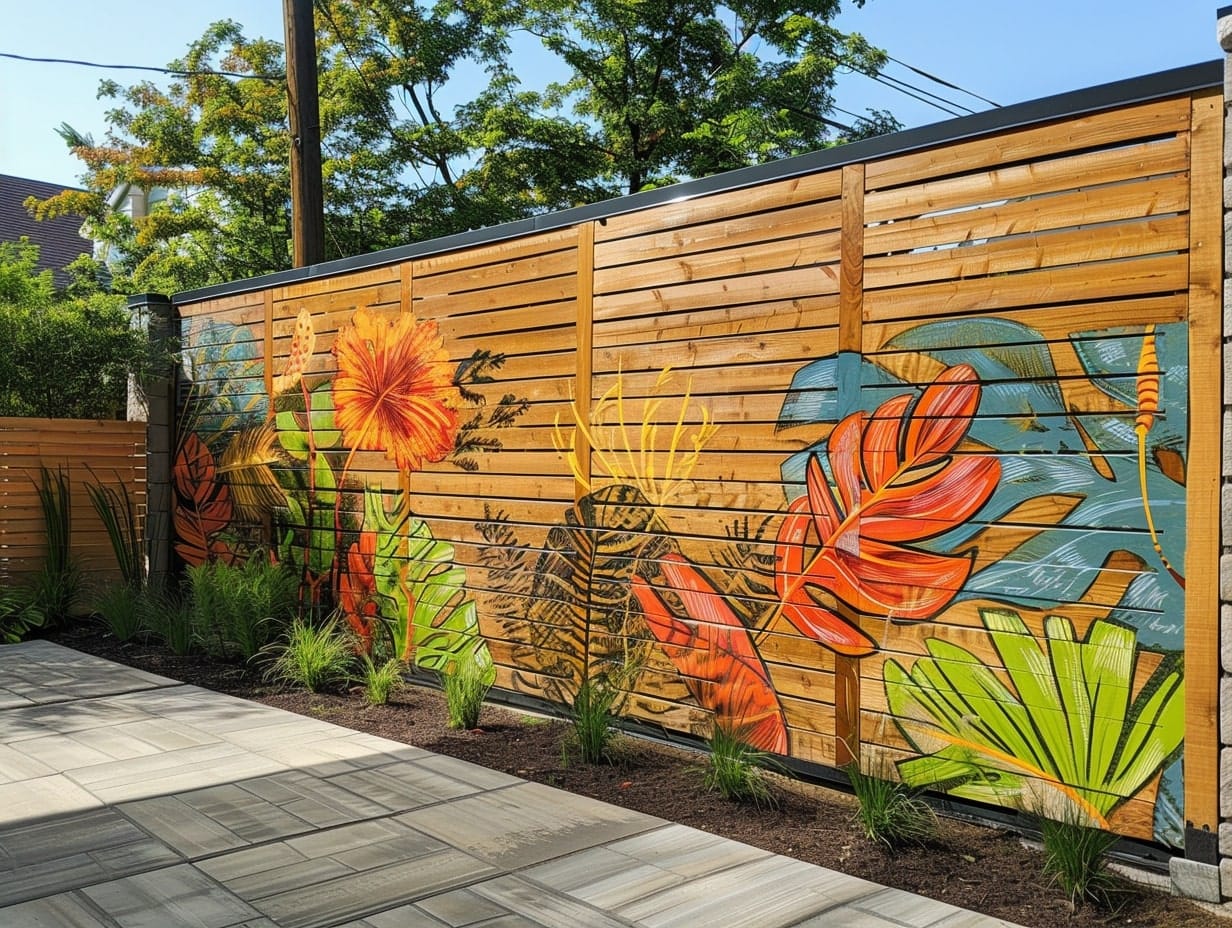
Begin by sketching your mural design. Consider the style of your garden and the visibility of the fence. Apply a coat of primer specifically designed for exterior wood; this will help the paint adhere better and enhance the durability of your mural.
Once the primer has dried, lightly sketch your design onto the fence using a pencil or chalk. Use paints suitable for exterior surfaces to ensure your mural withstands weather conditions. Acrylic outdoor paints are a popular choice as they come in a variety of colors and are known for their longevity.
Begin painting from the top of your design and work downwards. Use artist brushes or rollers depending on the size of the area you are covering.
Embed Glass Bottles Into Cement or Wooden Frames

Gather glass bottles of various colors, sizes, and shapes. For a cement structure, create a mold or frame where the cement will be poured. If using a wooden frame, ensure it is sturdy and treated to withstand outdoor conditions. The frame will serve as the border and structural support for your design.
Mix your cement according to the manufacturer's instructions. Pour the cement into the mold and carefully place the bottles at the desired locations. Make sure the bottles are stable and held in place as the cement sets. Allow sufficient time for the cement to cure completely.
For wooden frames, drill holes slightly smaller than the bottle necks where each bottle will be inserted. Apply a strong adhesive around the bottle neck and insert it into the drilled hole. Ensure each bottle is securely fixed and allow the adhesive to dry.
Once the cement has cured or the bottles are fixed into the wooden frame, apply a sealant to protect against weather elements. Install or place your finished structure in your garden. Ensure it is securely anchored to prevent tipping or shifting.
Repurpose Old Doors by Connecting Them Side to Side
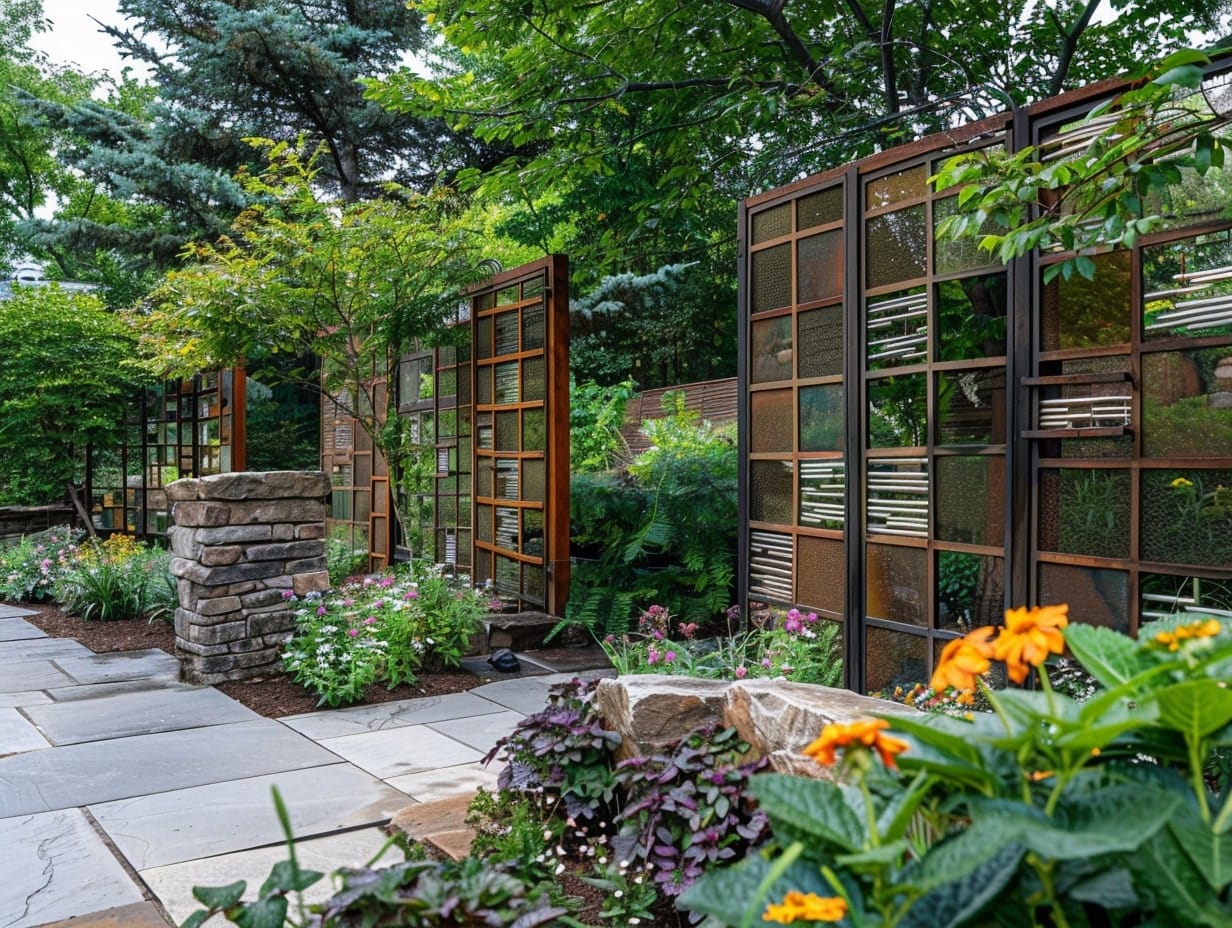
Start by gathering old doors. Prepare the doors by removing any hardware, such as knobs, hinges, and locks. Sand down any rough spots or peeling paint, depending on whether you want a more polished or rustic look.
Install posts to support the doors. These should be placed at the ends of each door and possibly in the middle if the doors are exceptionally wide. Use wooden or metal posts that are sturdy enough to hold the doors. The posts should be anchored deeply into the ground with concrete to ensure stability.
Attach the doors to the posts using heavy-duty hinges or brackets. If the doors are different widths, you may need to add wooden fillers between them to ensure a continuous, stable fence line. Make sure each door is securely attached to prevent it from swinging or becoming detached.
Use Wooden Slat Snow Fences for a Rustic Look
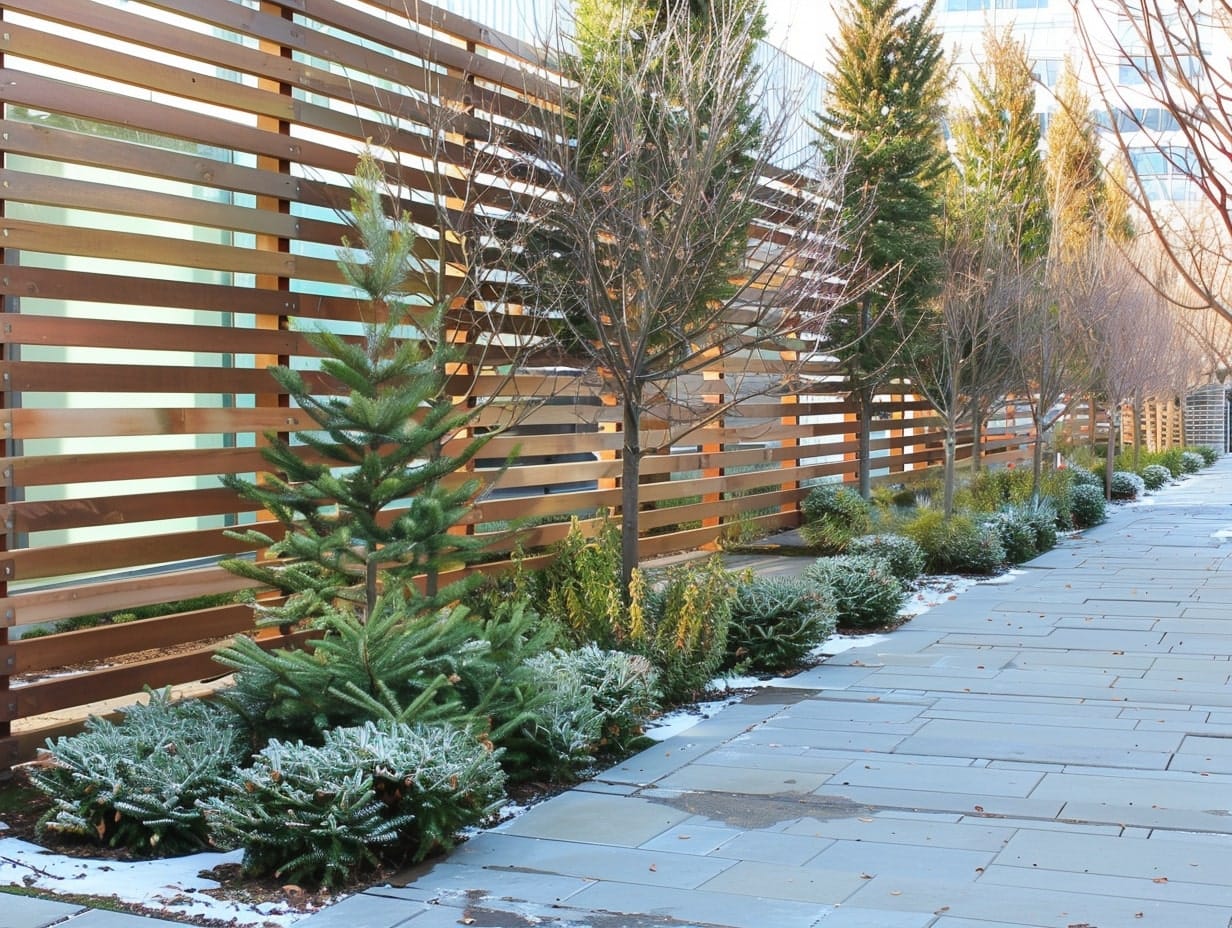
To use wooden slat snow fences effectively as garden fencing, start by sourcing high-quality, durable wooden slats. These are typically made of untreated wood, which weathers to a silver-gray patina over time, adding to their rustic appeal.
Installation involves setting wooden posts into the ground at regular intervals—typically every 6 to 8 feet — to support the weight and structure of the snow fence.
Ensure the posts are securely planted in the ground, possibly with concrete for additional stability. Attach the snow fence to these posts using staples or nails, stretching it slightly to keep it taut.
Consider integrating the fence into your garden design by using it as a backdrop for climbing plants or as a frame for hanging garden decorations.
Use Weather-Resistant Privacy Screens Between Posts
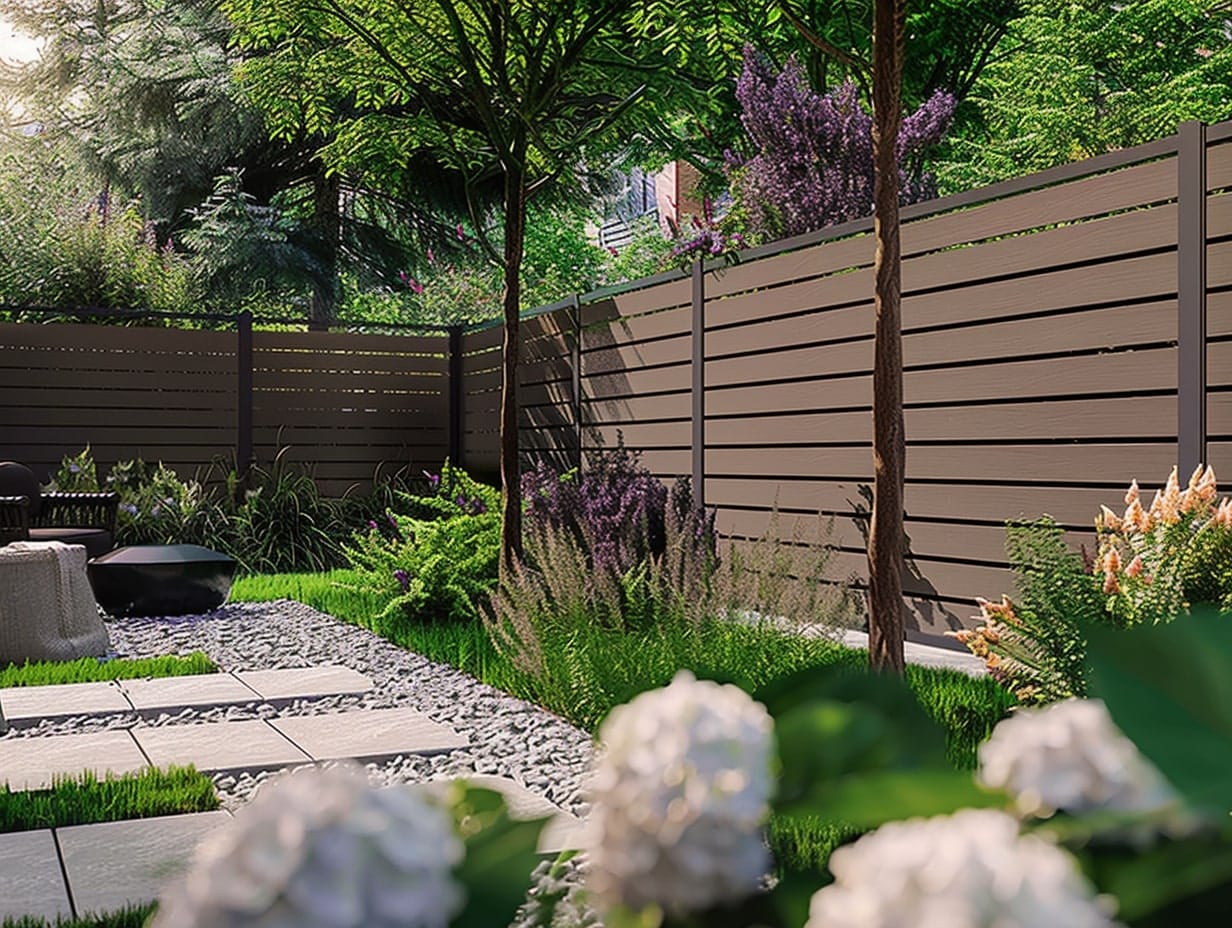
To begin, choose the material for your privacy screens. Options include outdoor-grade fabric, woven polyethylene, vinyl, or even metal panels, depending on the level of privacy and the style you're aiming for.
Each material comes with its own set of benefits; for instance, fabrics and vinyl provide flexibility and a variety of design choices, while metal panels offer durability and a more modern look. Select sturdy posts to support your privacy screens. These could be made of wood, metal, or even composite materials, depending on the overall design and the weight of the screens.
Attach the screens to the posts using hardware that matches the durability and weather-resistance of the rest of your materials.
For fabric screens, you might use grommets and ties or a track system that allows for easy removal and adjustment. For heavier materials like metal, secure the panels using screws or bolts that ensure stability.
Install Split Rail Fences for Large Yards
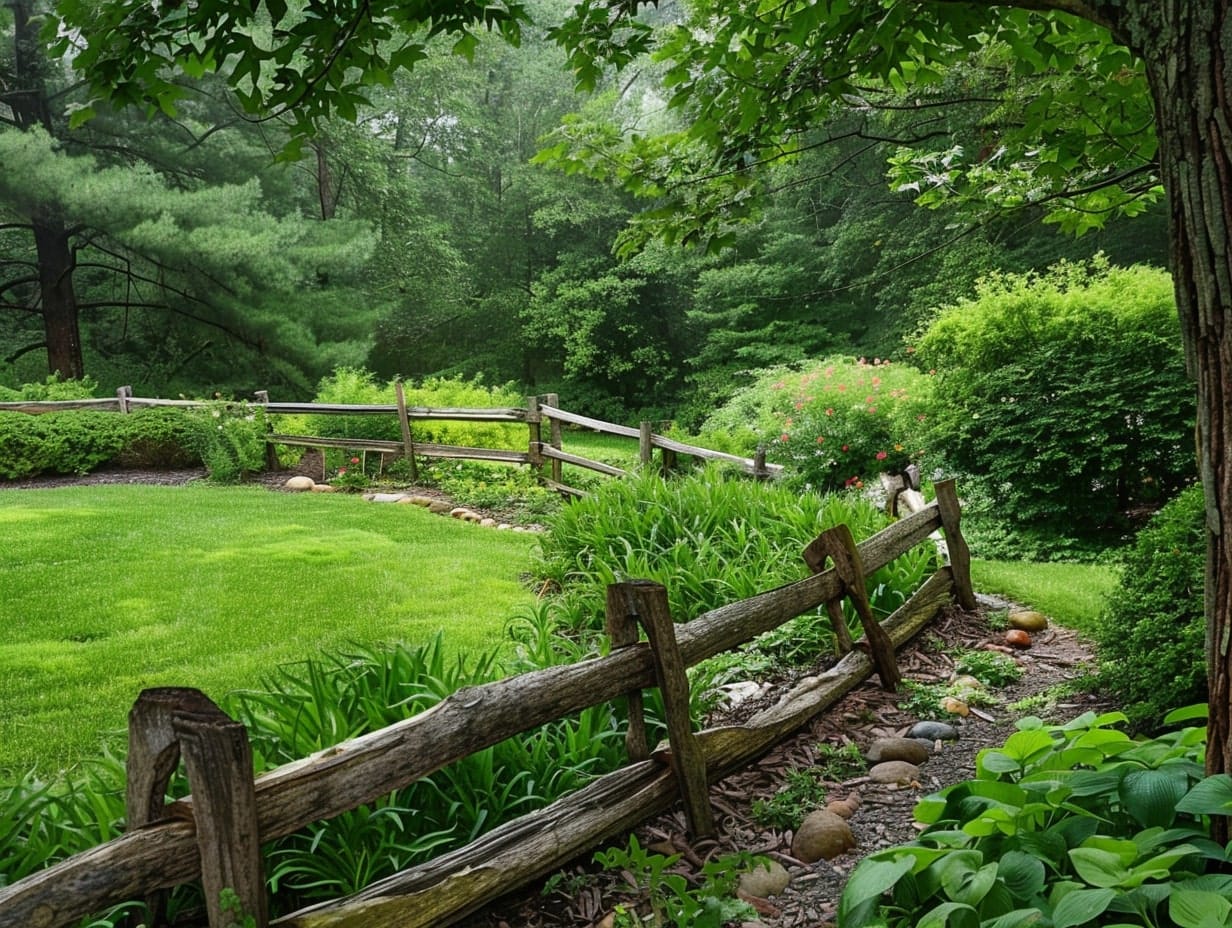
This type of fence is particularly popular in rural or suburban settings where large tracts of land are common, as it offers a traditional, open look that blends seamlessly with natural landscapes.
To install a split rail fence, start by planning the layout and determining the number of posts and rails you will need. Split rail fences typically consist of two or three horizontal rails fitted into notches on the vertical posts.
Mark the positions for your posts along the fence line. It's important to ensure they are spaced evenly, usually between six to ten feet apart, depending on the length of your rails and the terrain of your yard.
For stability, set each post in a hole that is deep enough to hold about one-third of the post's length and secured with gravel or concrete.
Once your posts are set and the concrete has cured, insert the rails into the pre-cut notches. Depending on the style of your split rail fence, the rails may simply lay in the notches or they may need to be secured with screws or nails. No special tools are required beyond basic hand tools for most installations.
Build a Gabion Wall for a Heavy-Duty Look
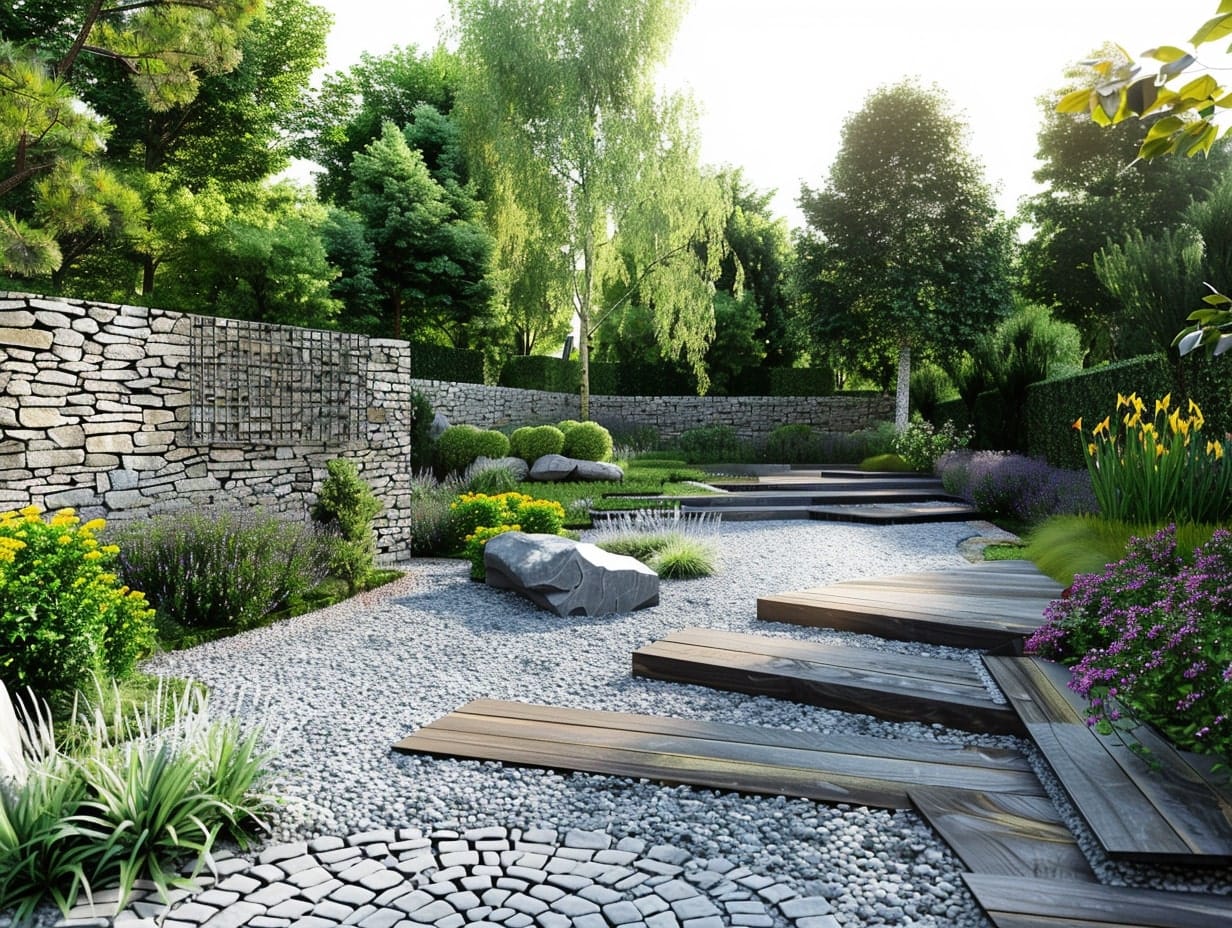
Gabion walls are made by filling large cages or baskets with rocks, stones, or sometimes recycled materials like crushed concrete. They are known for their durability, stability, and unique aesthetic appeal.
To construct a gabion wall, you first need to source the cages, which are typically made of thick, galvanized, or coated wire to resist corrosion. The next step is to select the filling material. This can include a variety of rocks, such as river rocks, crushed granite, or even colorful stones to add an artistic touch.
Begin the assembly of the gabion wall by placing the cages in the desired location. Fill the cages with your chosen material, packing the stones tightly to ensure that the cage remains rigid and the stones do not shift significantly over time.
Once filled, the cages can be secured together using ties or clips to form a continuous structure.
Use Vinyl Picket Fences for a Simple Look
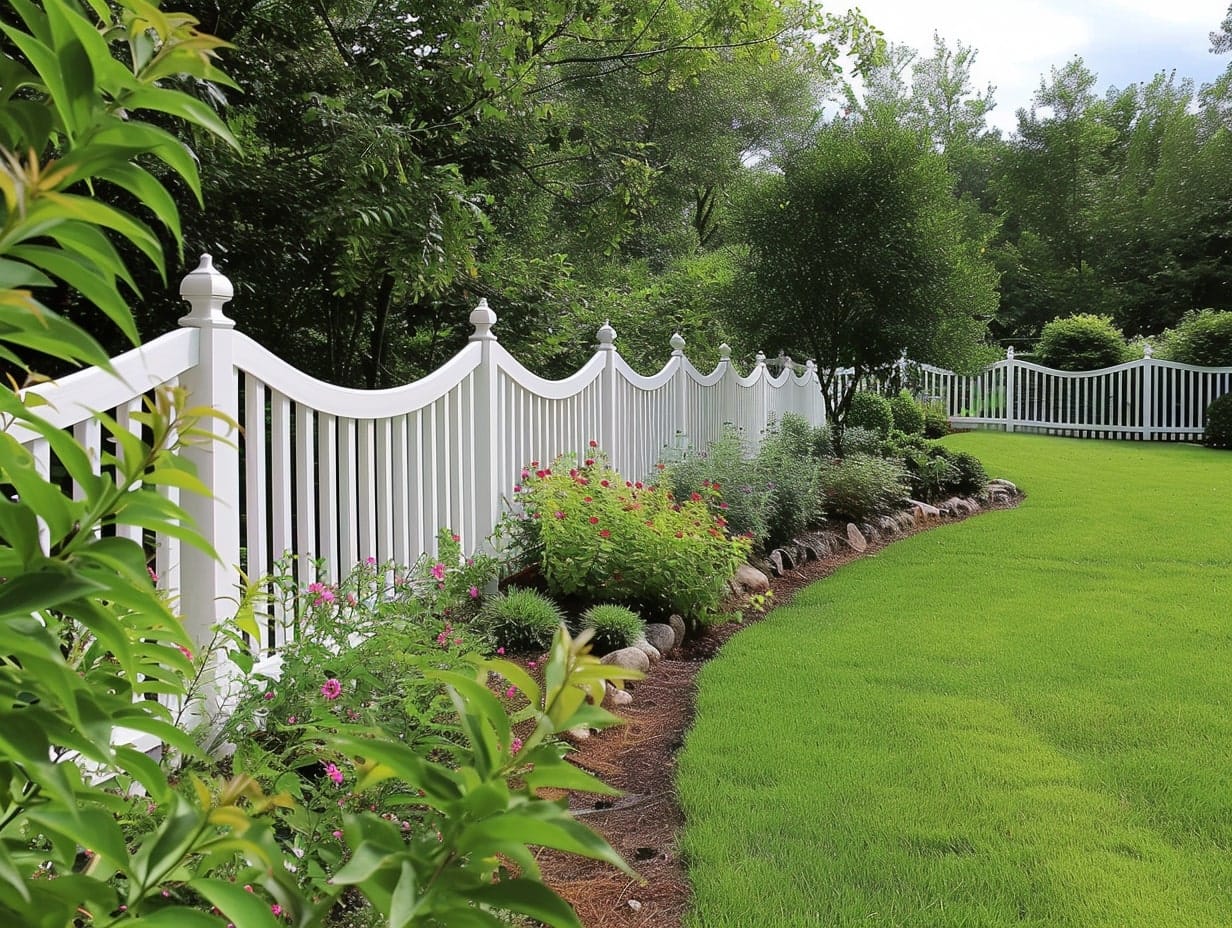
These fences are particularly well-suited to residential areas where a classic aesthetic is desired without the upkeep associated with traditional wood fencing.
Vinyl, as a material, offers several advantages. It does not rot, warp, or splinter like wood, and it resists fading and weathering from the elements. This durability makes vinyl an ideal choice for fencing.
Picket fences traditionally feature evenly spaced vertical boards (“pickets”) with a pointed or rounded top, connected by horizontal rails and anchored with posts. Common color choices are white, which mimics painted wood, and tan, which can blend more naturally into a garden setting.
Plant Dense Shrubs and Plants to Create a Green Living Fence
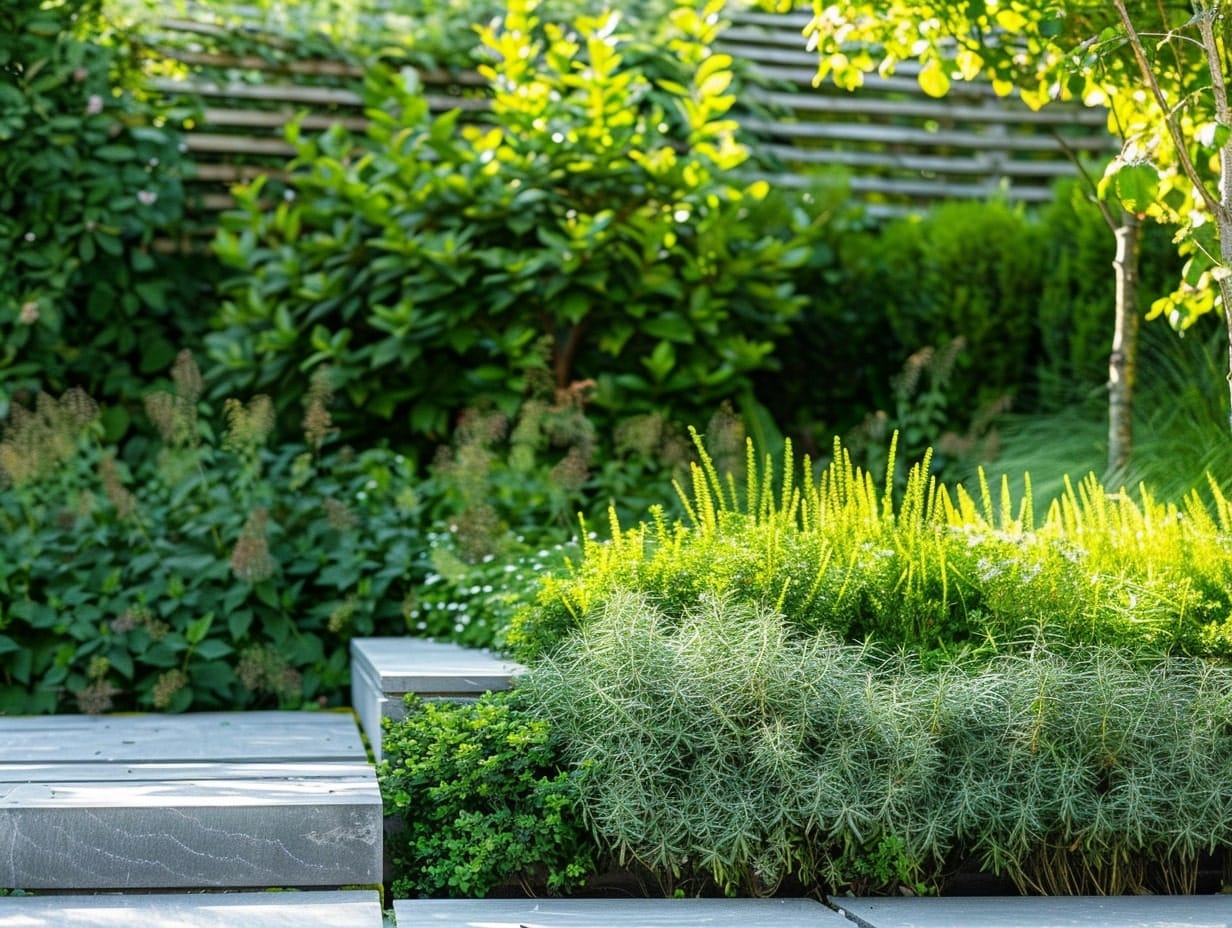
To create a green living fence, start by selecting shrubs that are suited to your local climate and soil conditions.
Choose species that grow densely and can be easily shaped through pruning. Some popular options include boxwood, privet, holly, arborvitae, and laurel. These plants typically grow quickly, have lush foliage, and can be maintained at various heights and shapes.
Use Brushwood Fencing for an Eco-Friendly Look
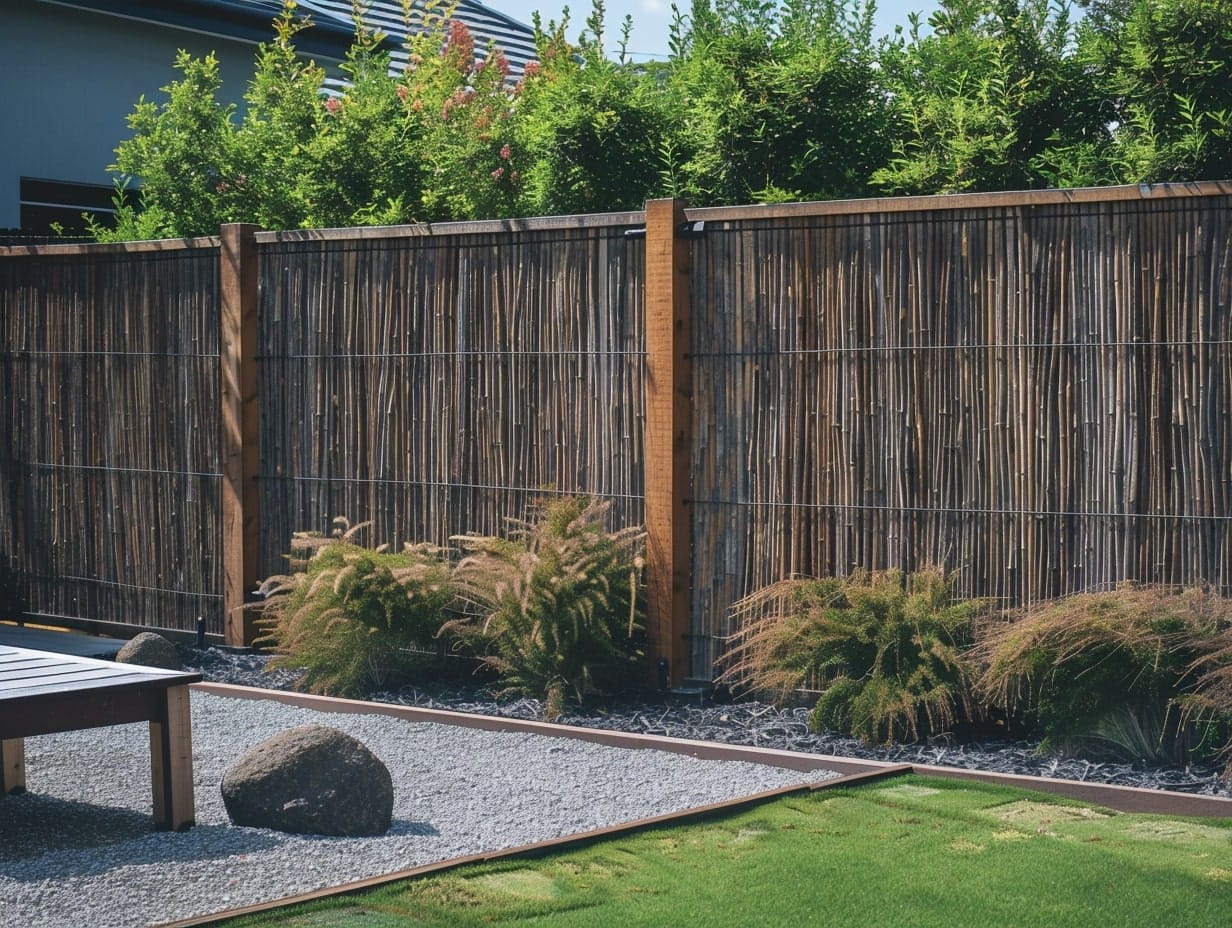
This type of fencing is made from densely packed natural materials such as twigs, branches, or reeds, providing a rustic and organic look that blends seamlessly into outdoor environments.
Constructing a brushwood fence involves creating a sturdy frame that can support the weight of the brushwood. Set up vertical posts made of wood or metal at regular intervals along the perimeter where you want the fence. These posts should be anchored deeply into the ground to provide stability.
Next, attach horizontal rails between the posts at the top and bottom. These rails will hold the brushwood in place. Pack the brushwood densely between the rails, starting at the bottom and working your way up to ensure that the material is tightly compressed for privacy and durability.
